Its Fermata Friday!! I am linking up with Elizabeth Caldwell over at Organized Chaos and some other blogger friends to share some fun ideas to use in your classroom. I hope you like these and find them to be useful.
1. Interactive Bulletin Boards
Ok so here's the deal... my administrator is a big fan of Interactive bulletin boards. So of course many of my colleagues have put up bulletin boards that draw people in and get them not only to think but to participate in the bulletin board display. I will gladly accept any and all brownie points won as a result!
You may be thinking right now...."How does one actually participate in a bulletin board?" The answer is simple but the implementation can be a little more tricky than just your every day run-of-the-mill bulletin board. First, let me say that I am a proponent of bulletin boards that are more than just pretty. Don't get me wrong, I LIKE attractive boards. I strive to make all of mine attractive and even go so far as to make many of them myself. (Shhhh! I have even been known to trace and cut out my own letters to make my displays more unique.) I know, I know...that's crazy talk!
An interactive bulletin board is one where student participation is requested in some way. Students might offer their opinion on a topic, give their input or thoughts on a topic, or select/vote for a topic in the form of a graph. The bulletin board asks about the topic, tells students how to respond and offers them a way to do so.
Are you ready to see it??? Okay, here it is!
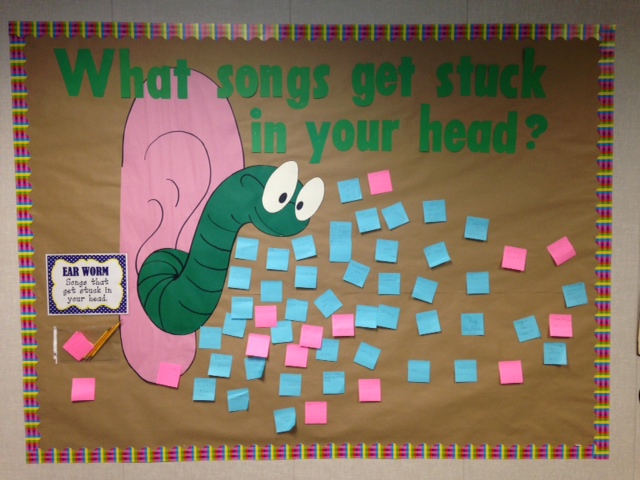
So as you can see the question at the top asks what songs get stuck in your head? The card explains what an ear worm is so that students get the mental picture. Directions were not really necessary because students at my school already know when they see sticky notes on the bulletin board they are allowed to take one off the pad and write a response. I would suggest that you get a pack of the super sticky notes to use if you try one of these because regular sticky won't cut it. We all learned that the first year anyone tried this.... the notes ended up on the floor. I haven't had any fall off that I'm aware of because I put super sticky notepads in the holder. The holder... there is another slippery slope. We have had baskets, we have had envelopes, we have had in this case a page protector cut in half. Be prepared for that one part to be less than pretty. If you come up with a brilliantly genius way of keeping pencils and sticky notes together and off the floor please let me know. I'd be interested to try it out. Hopefully this will get all those of you out there with super creative juices to start flowing! Let me know what you have tried or what you plan to try! Share your thoughts! I'd love to have some more ideas to keep kids talking/thinking about music all year long!
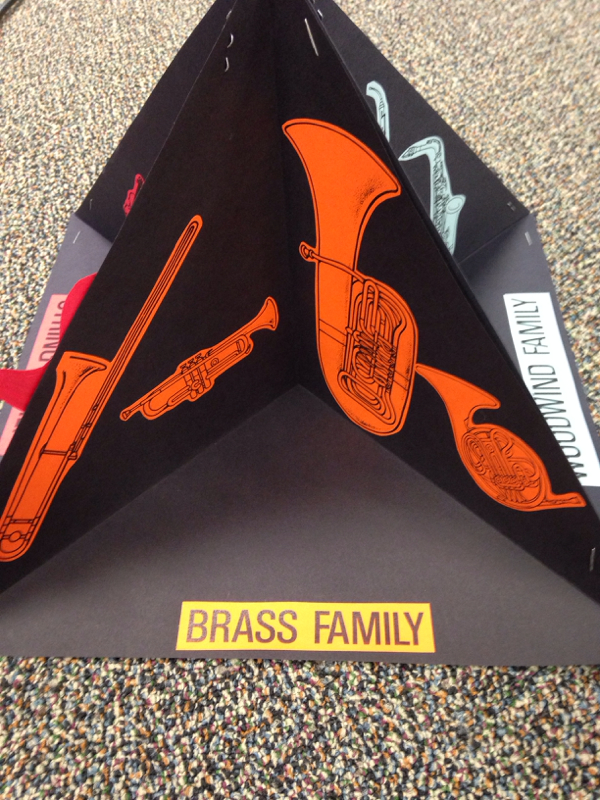
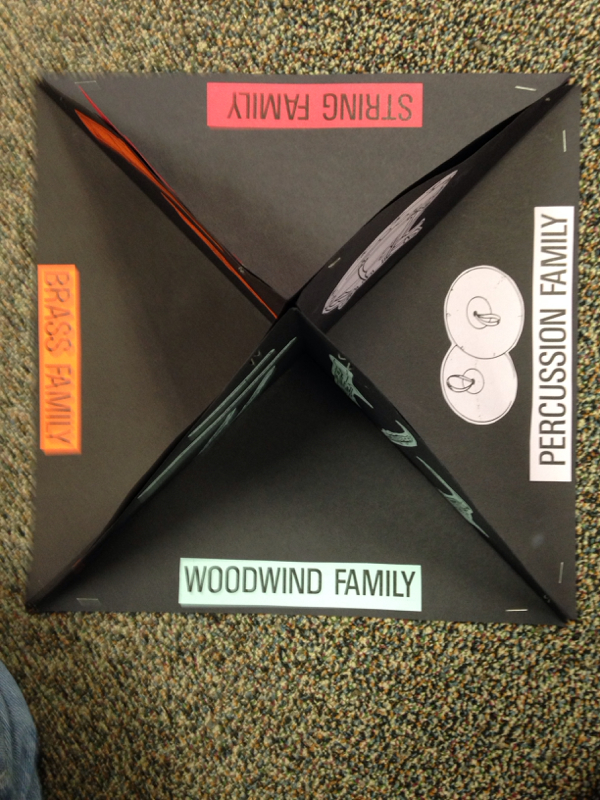
2. Orchestra Instrument Project
Here is a project my 5th graders will be doing in the next rotation (or two) - they are a chatty bunch. We've been reviewing the orchestra families and I have given them the following project to work on:
|
|

Each student needs 4 squares of construction paper.
I hope these directions make sense. If you need further clarification please don't hesitate to ask!
Mark
- Fold square in half from corner to corner creating a triangle. Crease. Open square and fold in the other direction and crease again.
- Now open your square and on one of your folds cut along the line created by the fold all the way to the center point.
- When you have finished cutting that one line, overlap the two sides of the cut and glue or staple.
- Now you should have one section of the pyramid. Repeat the directions above 3 more times to complete the other 3 sides of your pyramid.
- Now students can cut and paste instrument pictures and label the instruments in each segment or side of the pyramid.
- Glue or staple the 4 segments together to complete the project.
I hope these directions make sense. If you need further clarification please don't hesitate to ask!
Mark
Use the link above to see the next blog in this linky party. Leave a comment below!


 RSS Feed
